How to Install Self-regulating Heating Cable System Into Septic System Pumping Chamber
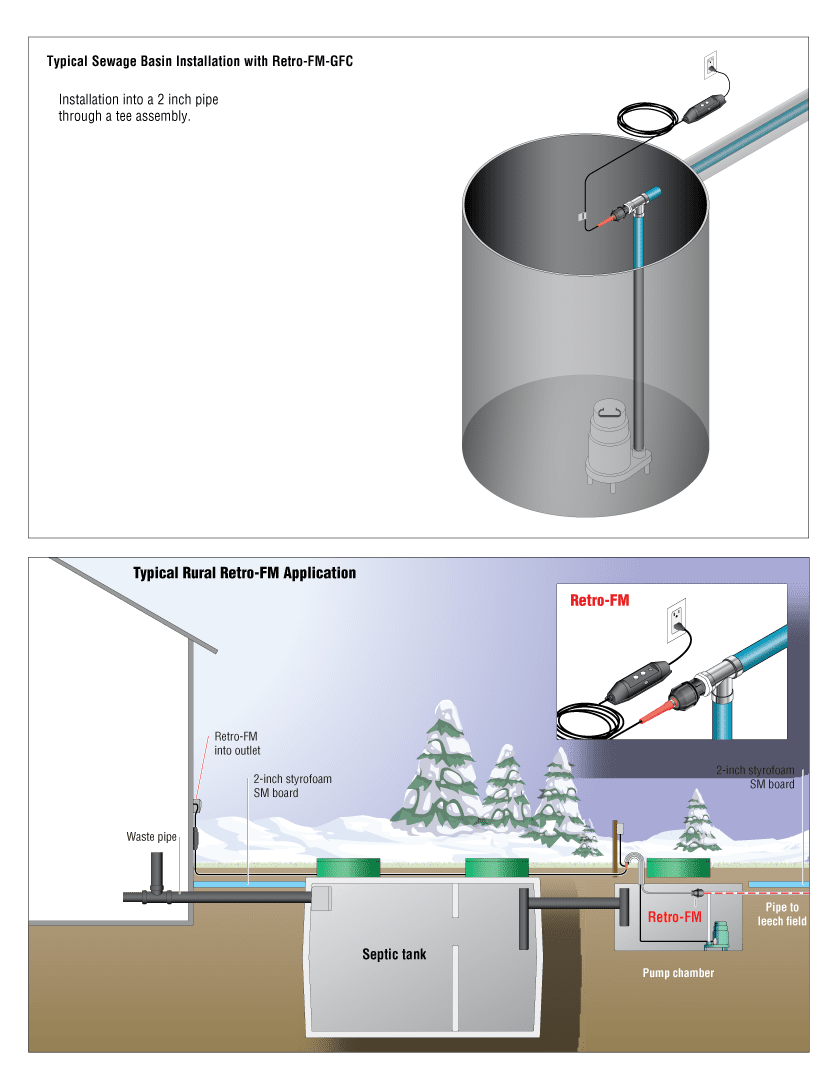
One of the common questions that we receive is, “How do we introduce the Retro-FM into an effluent pump pipe when we’ve already got the plumbing connections outfitted?” In this video we detail how to freeze protect an existing septic system effluent pump pipe using our Retro-FM self-regulating heating cable system. This installation is a safe, reliable and easy solution to this common pipe freeze issue.
Remove the Existing Elbow
In order to connect the Retro-FM in a pumping chamber when the pipe fittings are already outfitted, you will need to start by removing the existing elbow.


Replace with Tee Fitting
Once removed, you’re going to replace it with a tee fitting. In the video example we use a 2 inch threaded tee with 2 philmac male adaptors threaded in on either side. It is a 2 inch male by 2 inch poly compression fitting. If you’re not using poly pipe with your particular sewage force main you can connect other types of pipes but the configuration is exactly the same. What’s important is to have a female thread as the point of entry for the Retro-FM system.


Once the new tee fitting is introduced the water will still flow 90° just as it did before and will be pushed through the horizontal plane to your septic holding tank or your tile bed. This now allows the Retro-FM system to be fed through the horizontal plane to either that holding septic tank or the tile bed.
Install Retro-FM System
The Retro-FM system includes a 1 inch female to 2 inch male threaded bushing and works perfectly for this example. The 2 inch threaded bushing threads into the tee and then the Retro-FM would be fed inside. It is important that the nut is spun loose so that the tubular heater does not start spinning inside as the fitting is threaded on. This is done to ensure that the heating cable does not twist inside the tubular heater. Once this is all threaded and connected properly we then come back to the nut and tighten it down as the final step.
With the Retro-FM now introduced into the septic system pump chamber effluent pipe you would now bring the power out of the pumping chamber where you’ll have a power supply to energize the Retro-FM when the season permits.
For detailed instructions please watch the video above, or view the installation document on the Retro-FM product page.


